01
STEP 01
Login to the Administration Panel
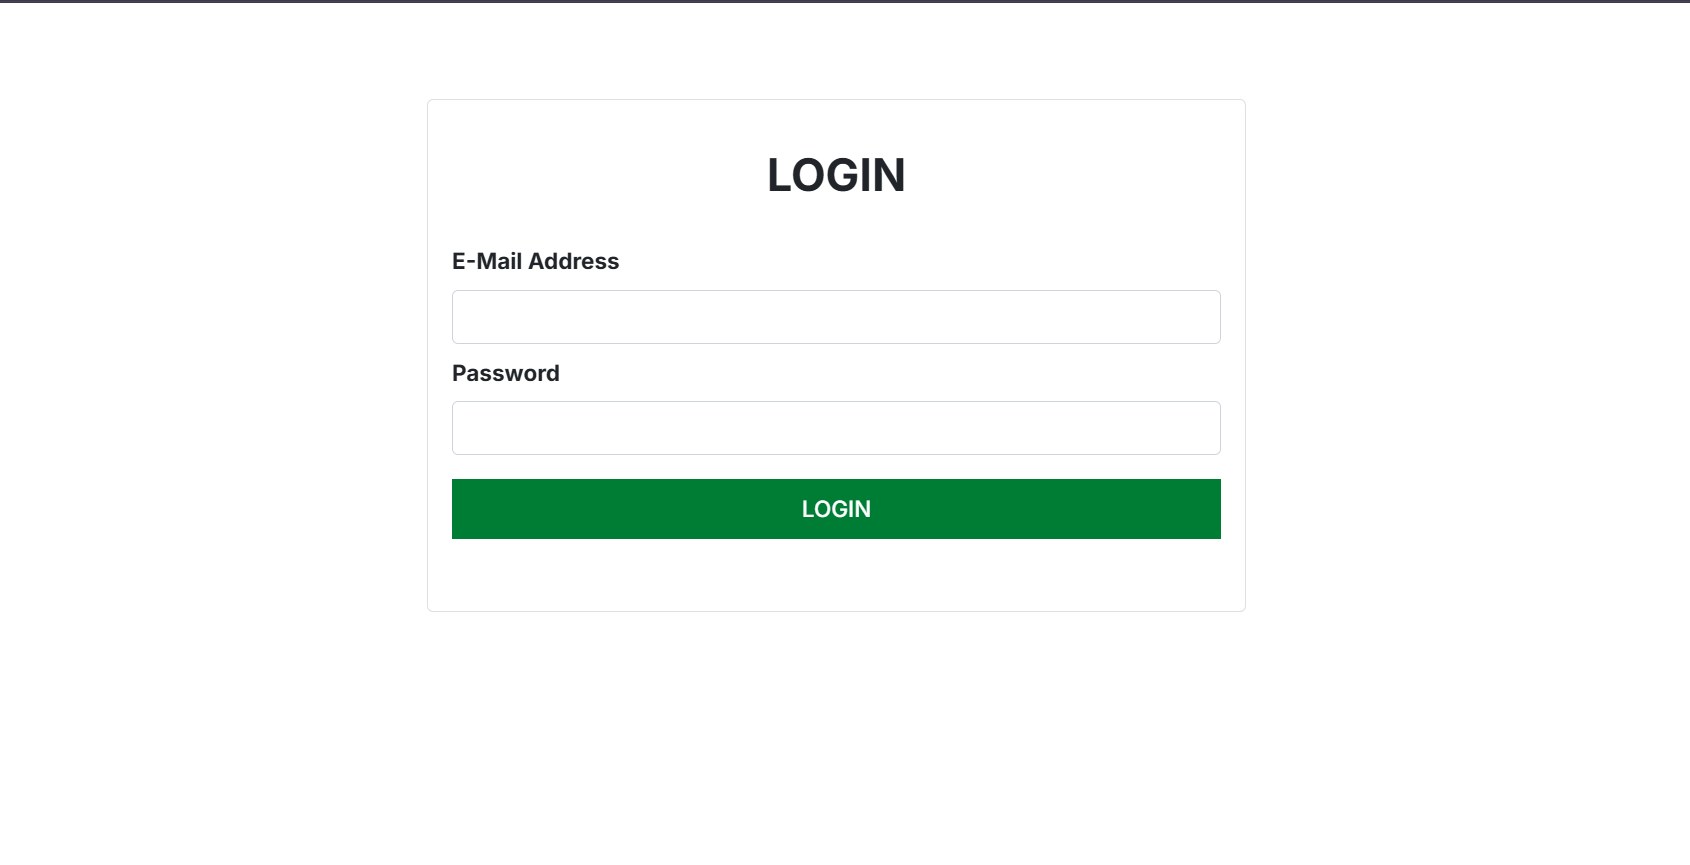
Enter your registered e-mail address and password, then select Login to access the administration dashboard.
A clear visual guide for managing sponsors, events, memberships, gallery images, teams and team charts through the SLCFW.org administration panel.
Follow each step in order. The screenshots show the actual administration interface and the highlighted controls identify the main actions to use. Image dimensions shown in the system should be followed when uploading graphics.
Enter your registered e-mail address and password, then select Login to access the administration dashboard.
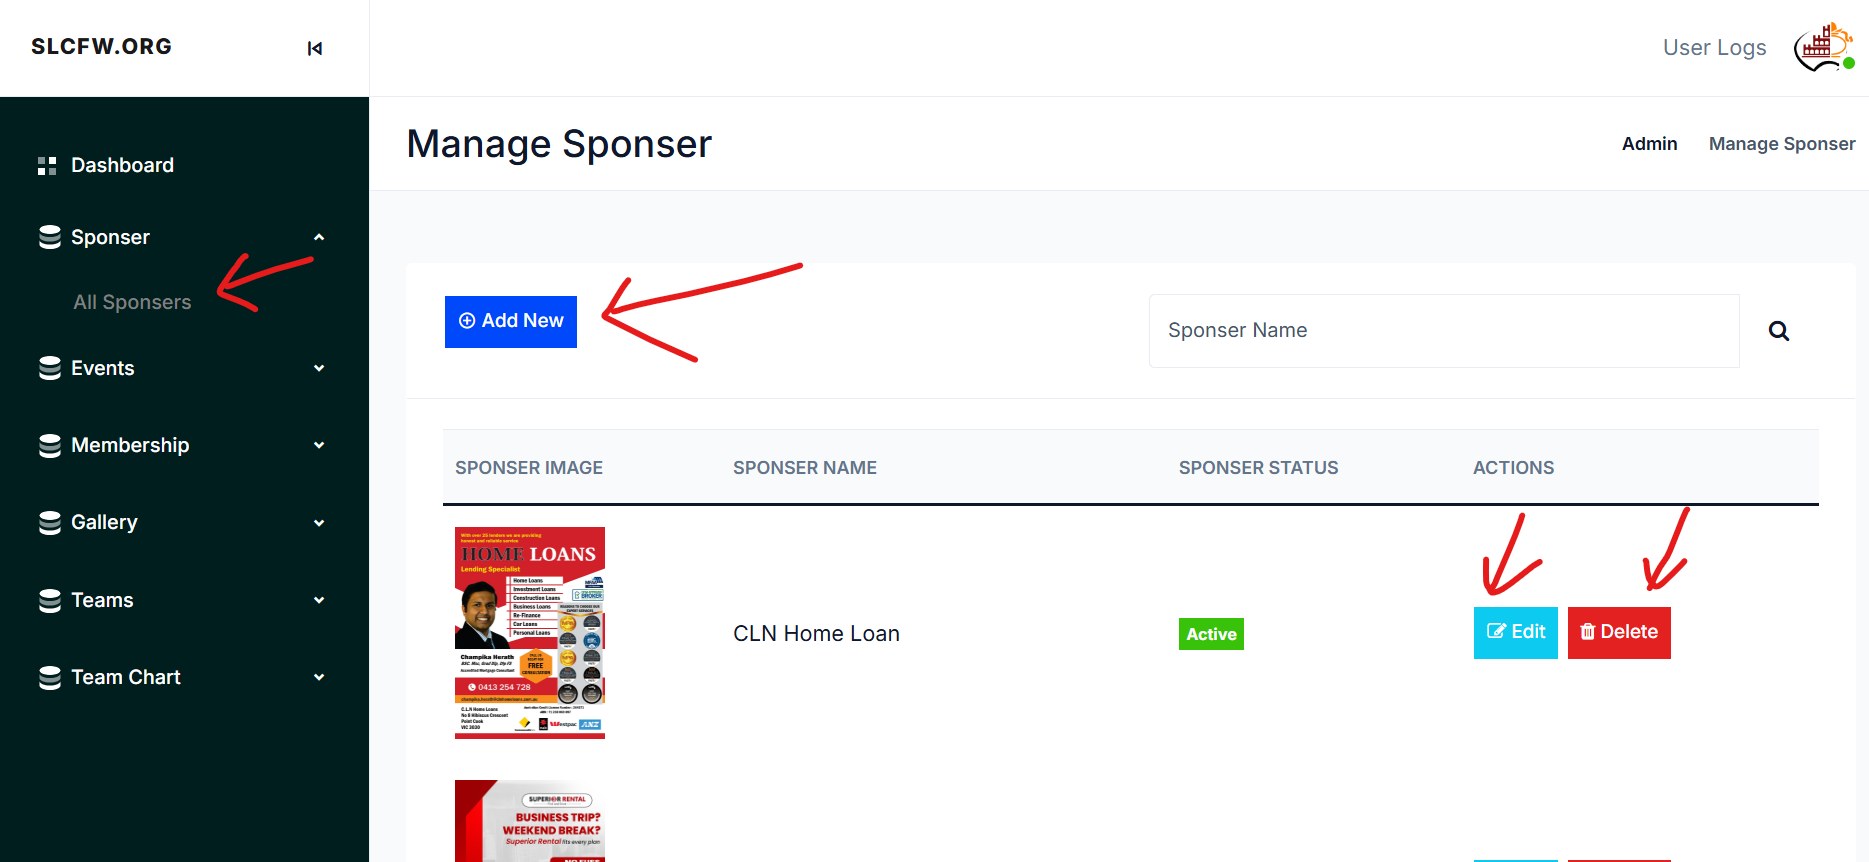
From the left navigation menu, open Sponsor and select All Sponsors. Use Add New to create a sponsor.
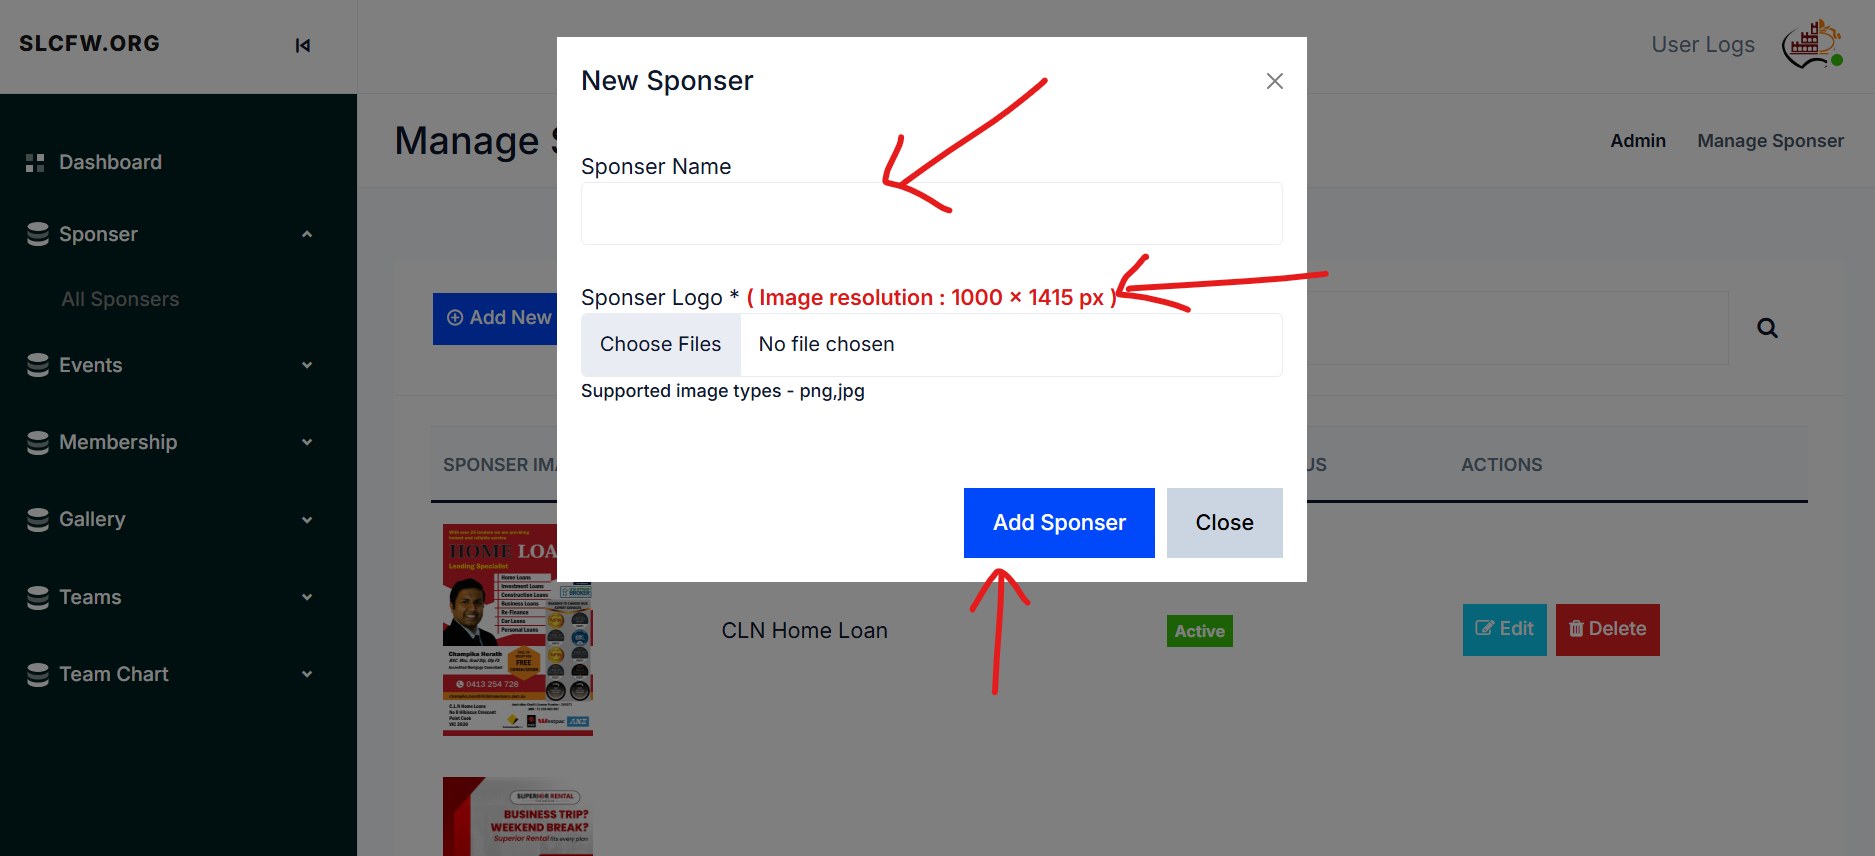
Enter the Sponsor Name, upload the sponsor logo in the required 1000 × 1415 px format, and select Add Sponsor.
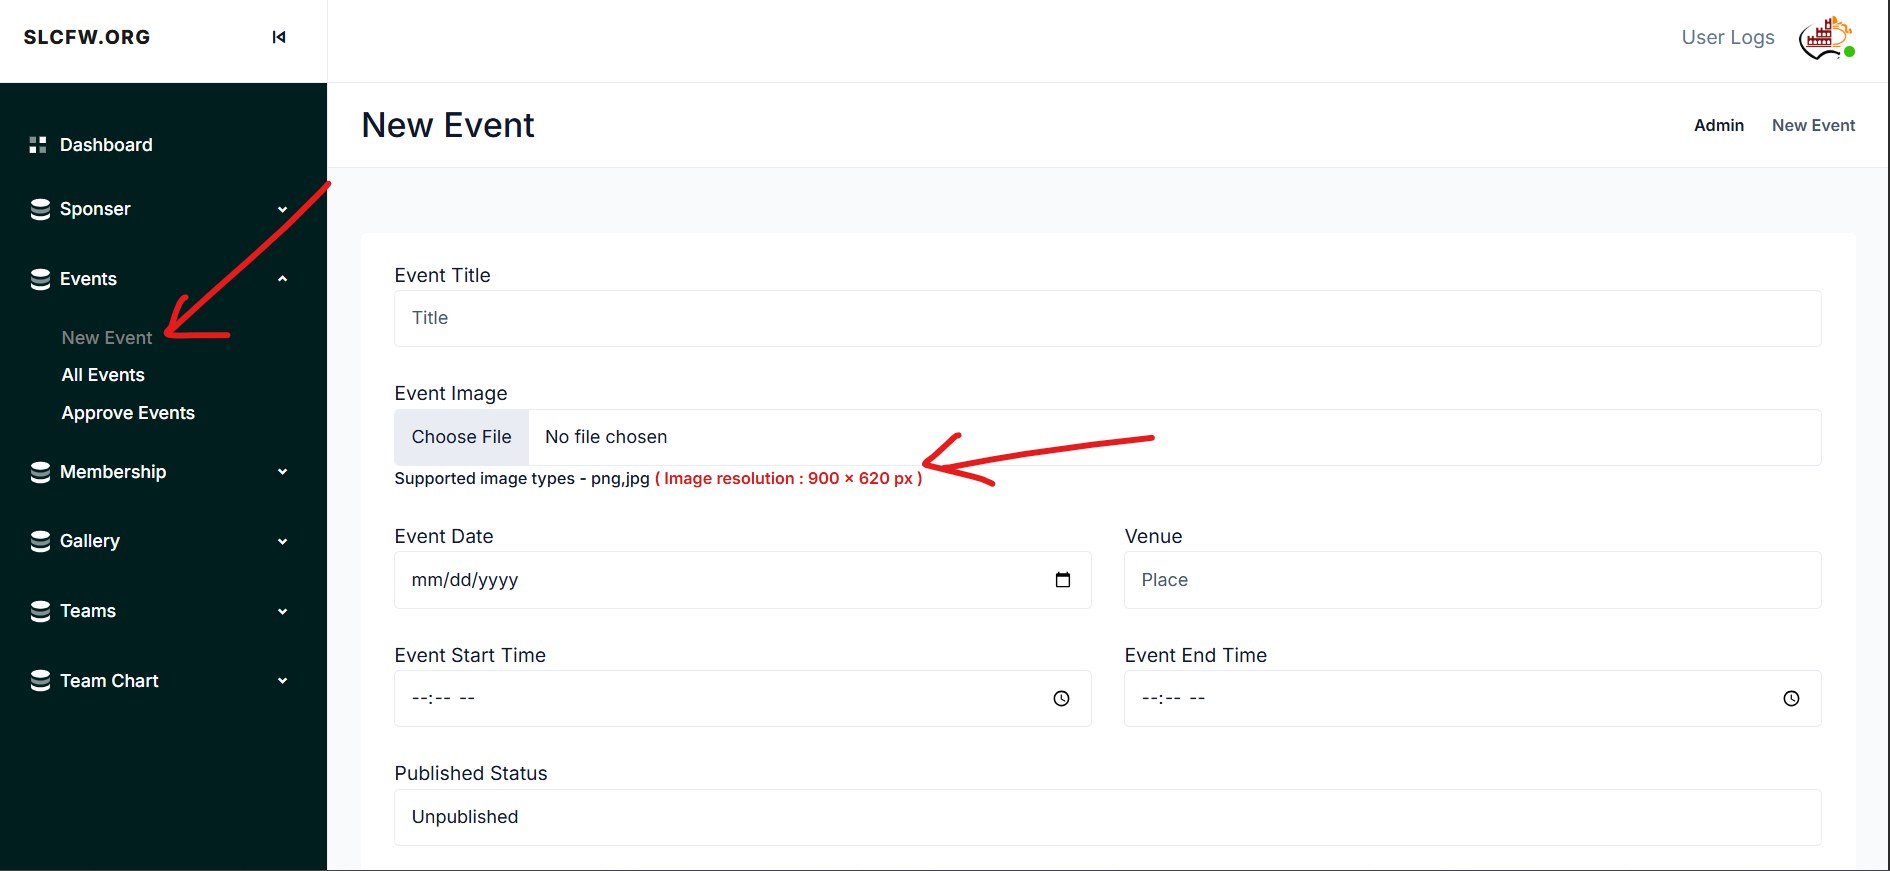
Open Events → New Event. Enter the event title, upload the event image, choose the event date, venue, start time, end time, and publication status.
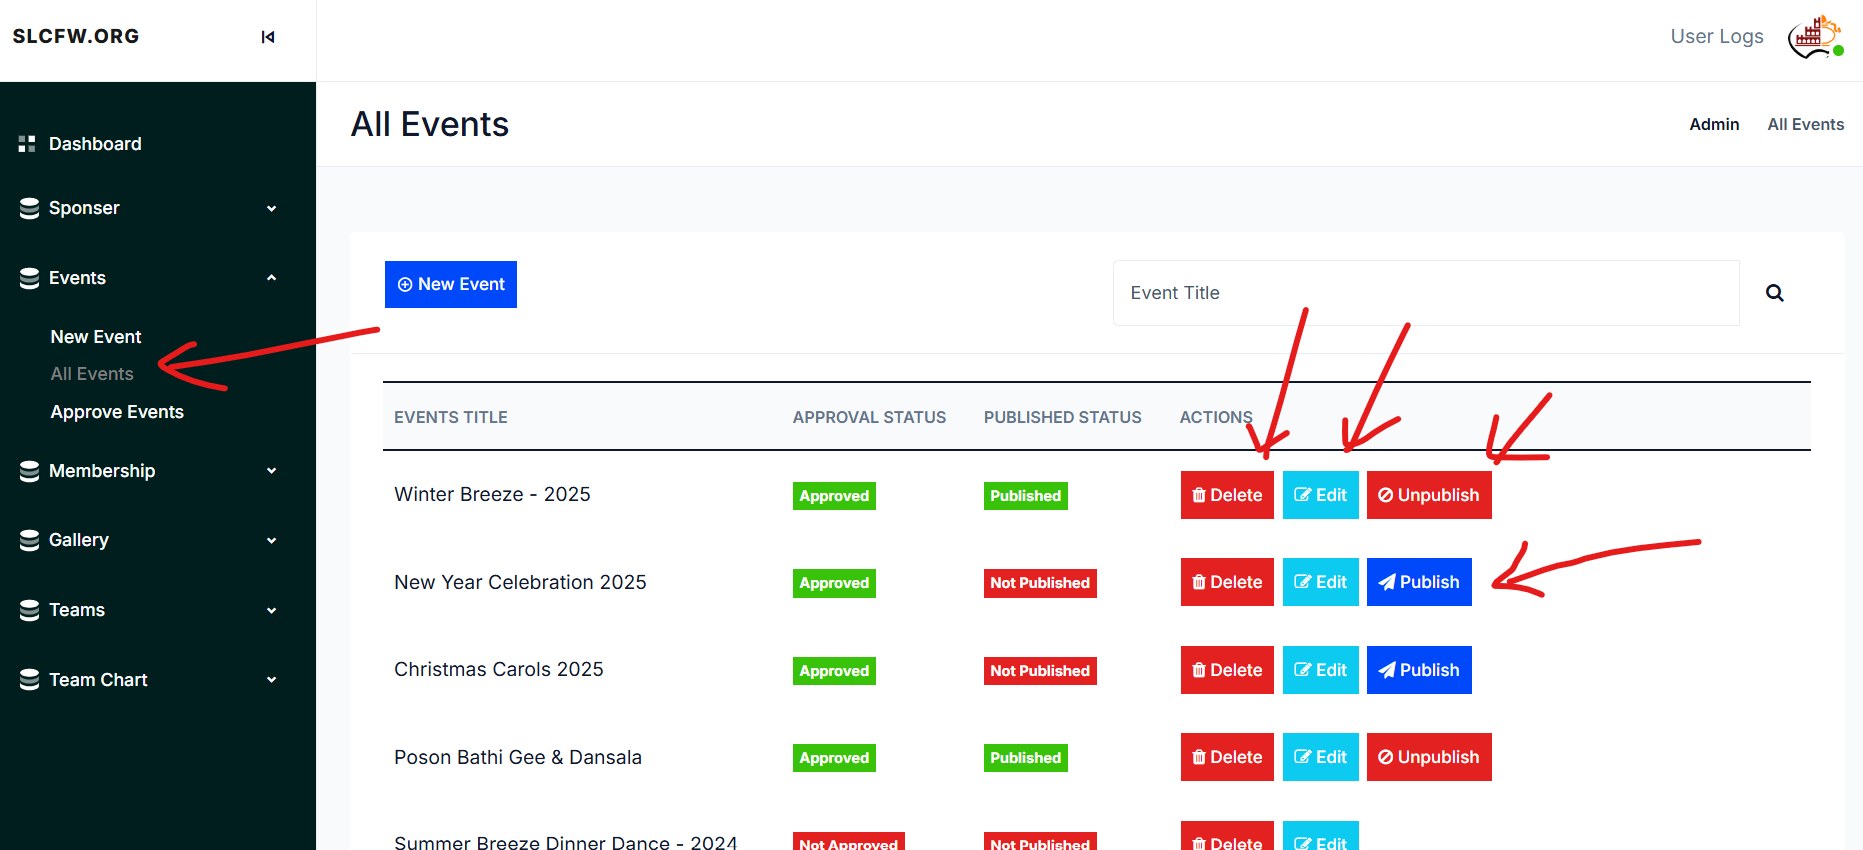
Use All Events to search and manage events. Administrators can edit or delete events and publish or unpublish approved events.
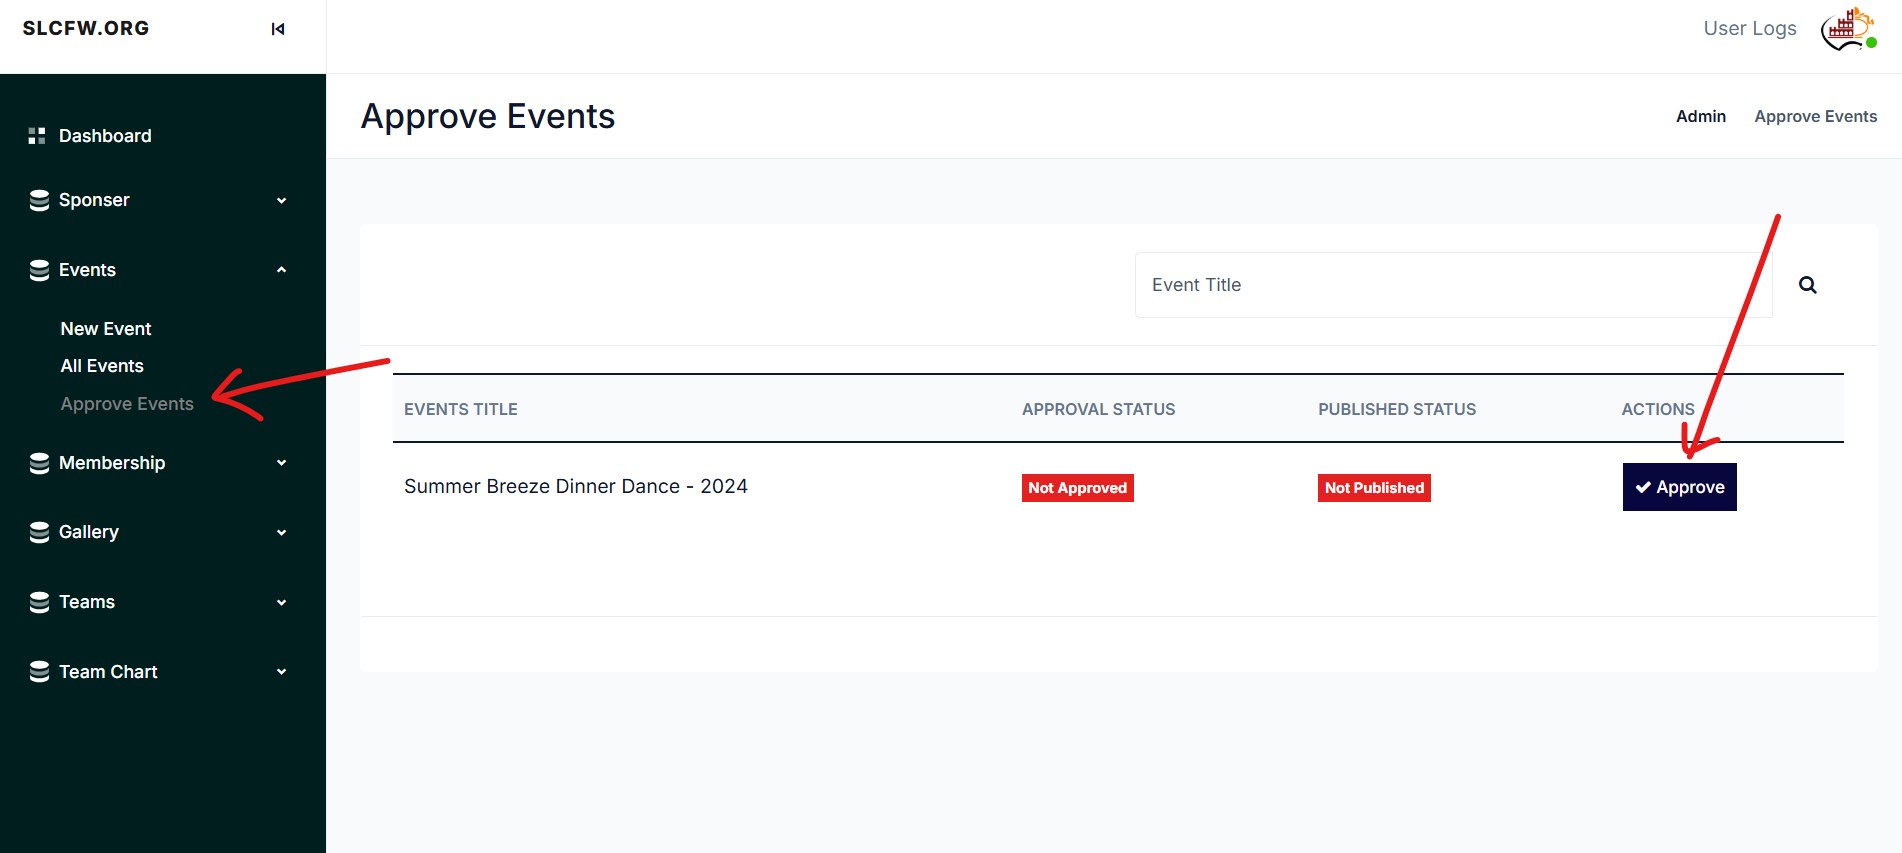
Open Events → Approve Events to review events that are waiting for approval. Select Approve when an event is ready to be approved.
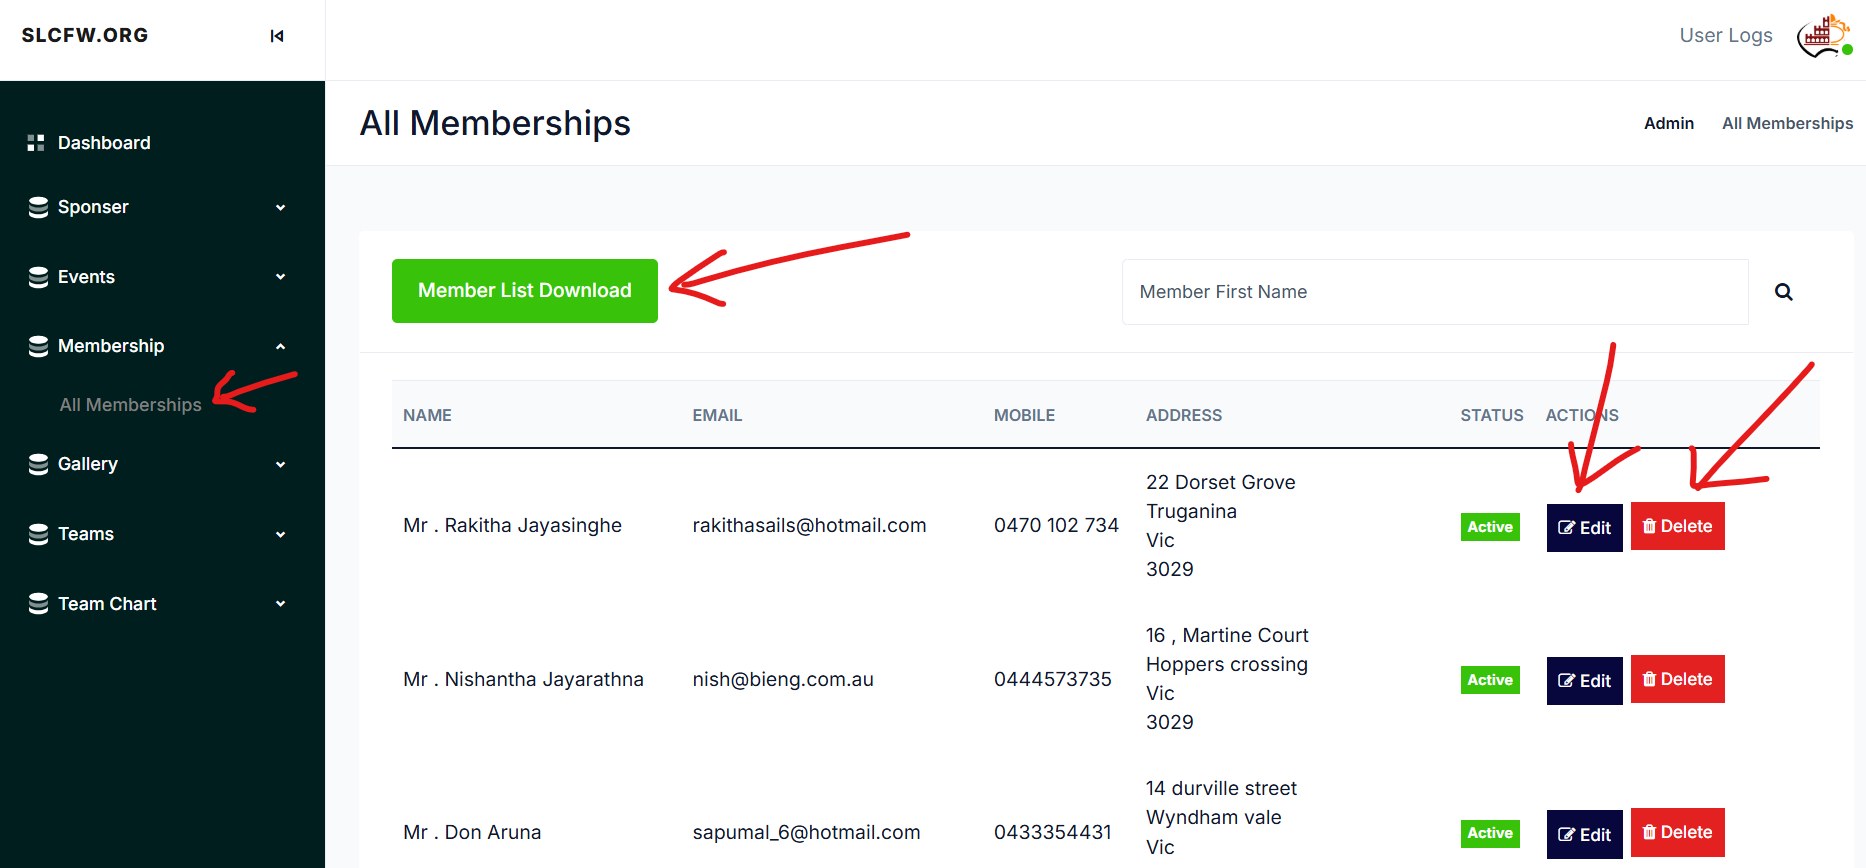
Open Membership → All Memberships to view members. You can download the member list, search members, edit records, or delete a membership record.
Open Gallery → All Gallery Images. Existing images are grouped by gallery/year and can be removed using the Delete action.
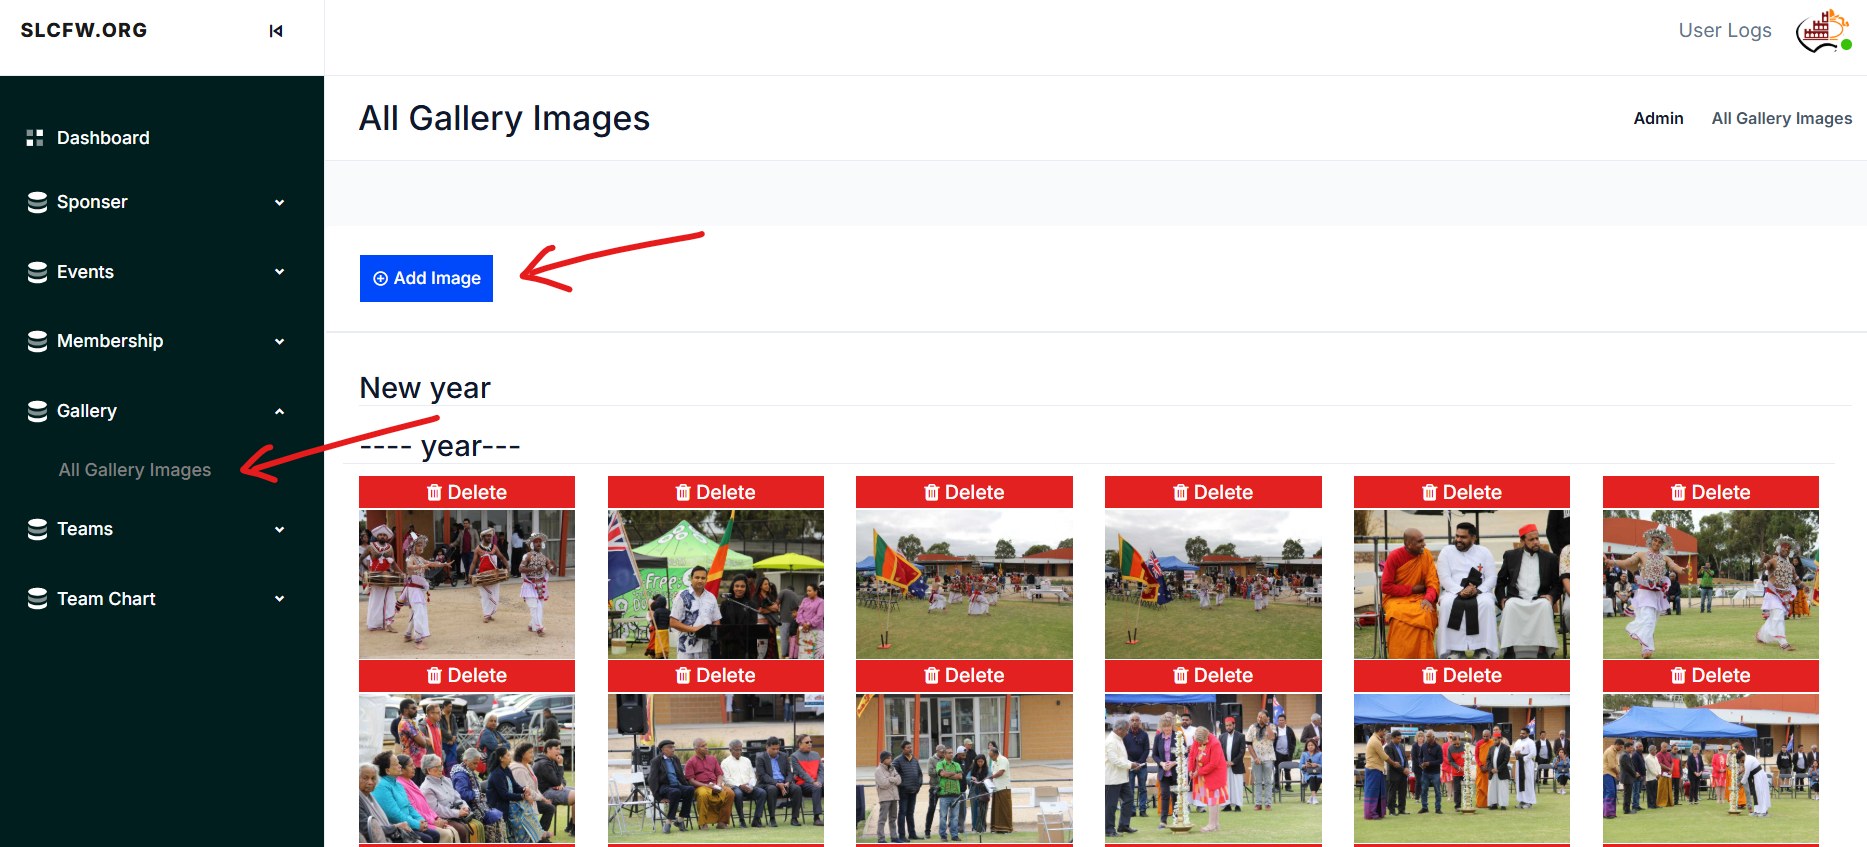
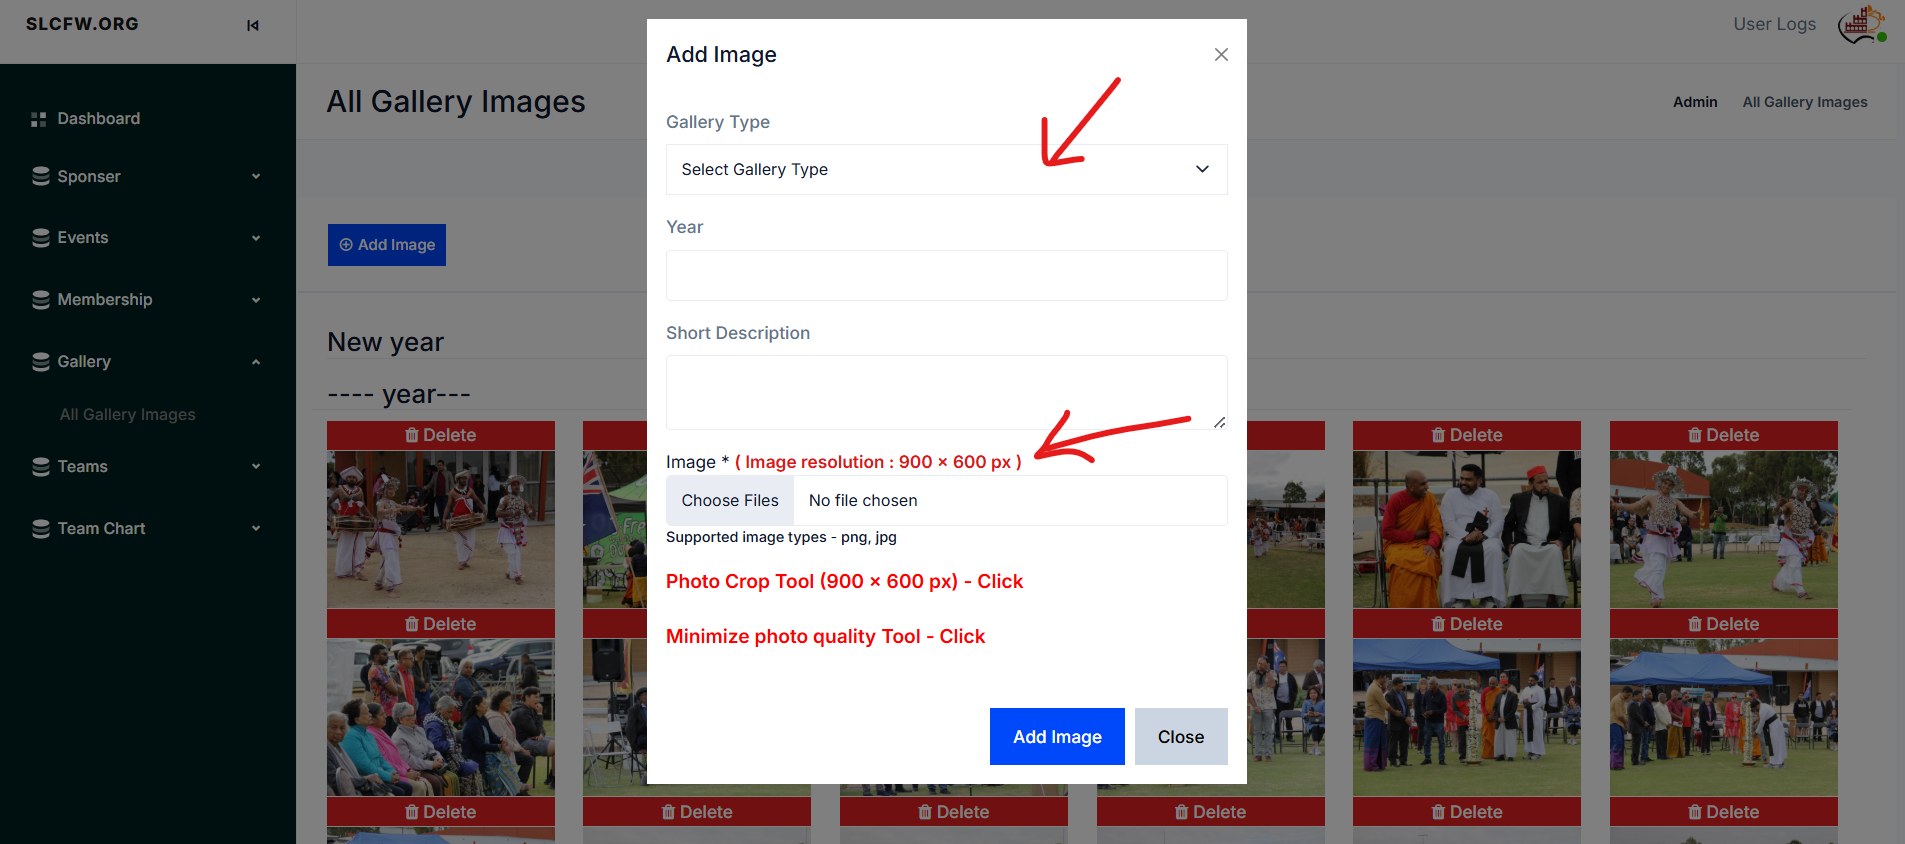
Select Add Image, choose the gallery type, enter the year and short description, then upload an image using the required 900 × 600 px format.
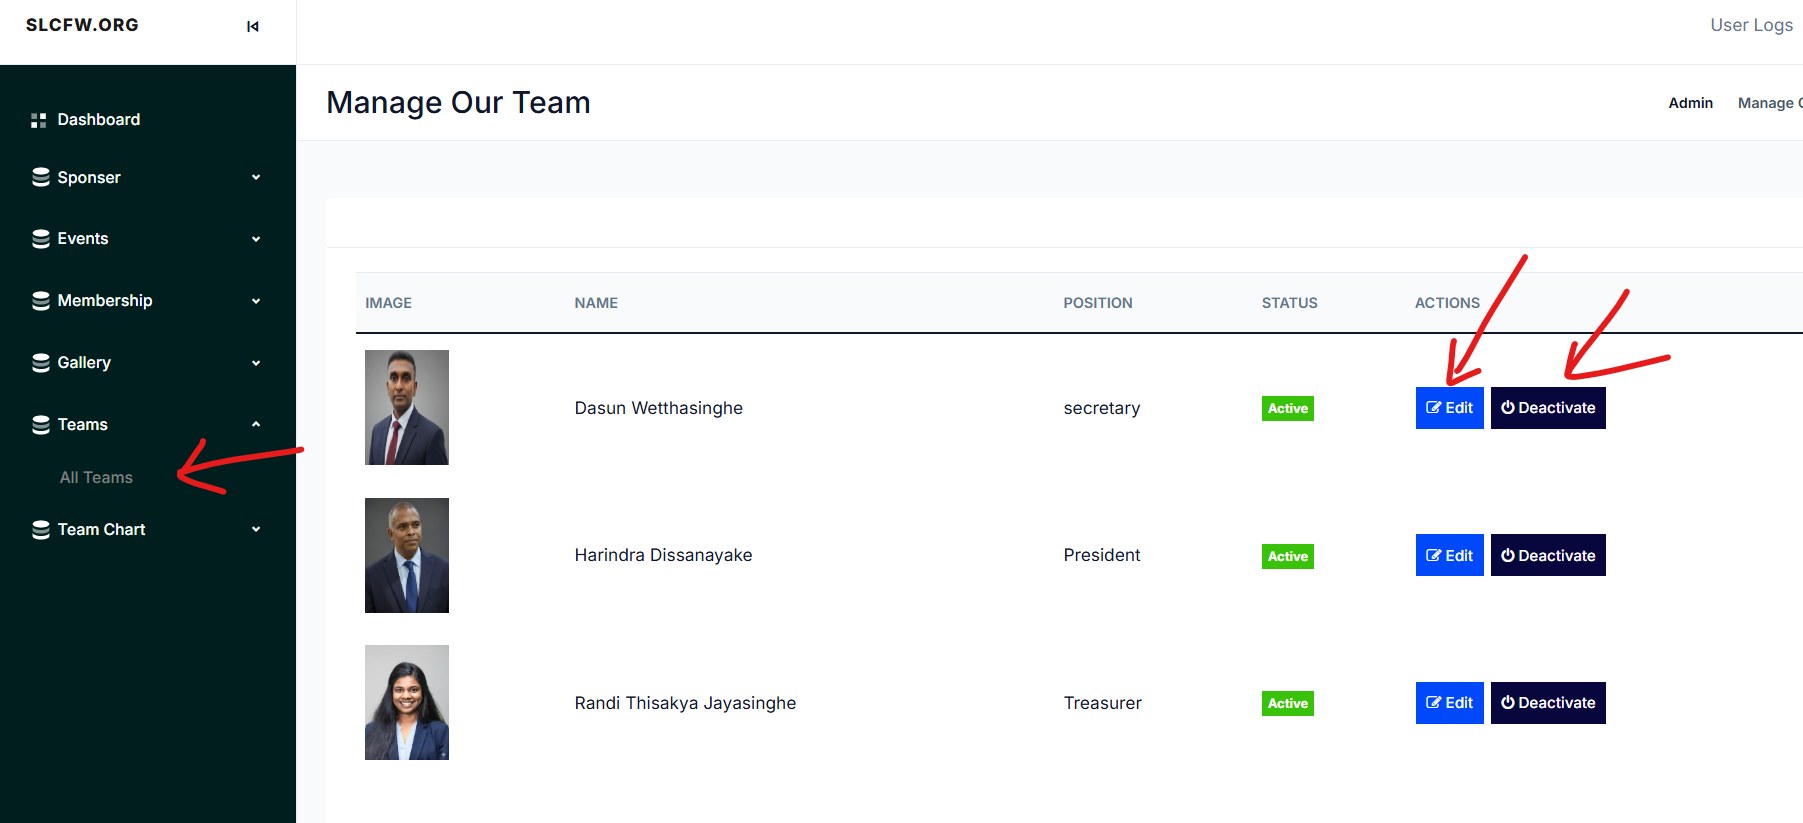
Open Teams → All Teams to view team members. Administrators can edit member details and activate or deactivate members.
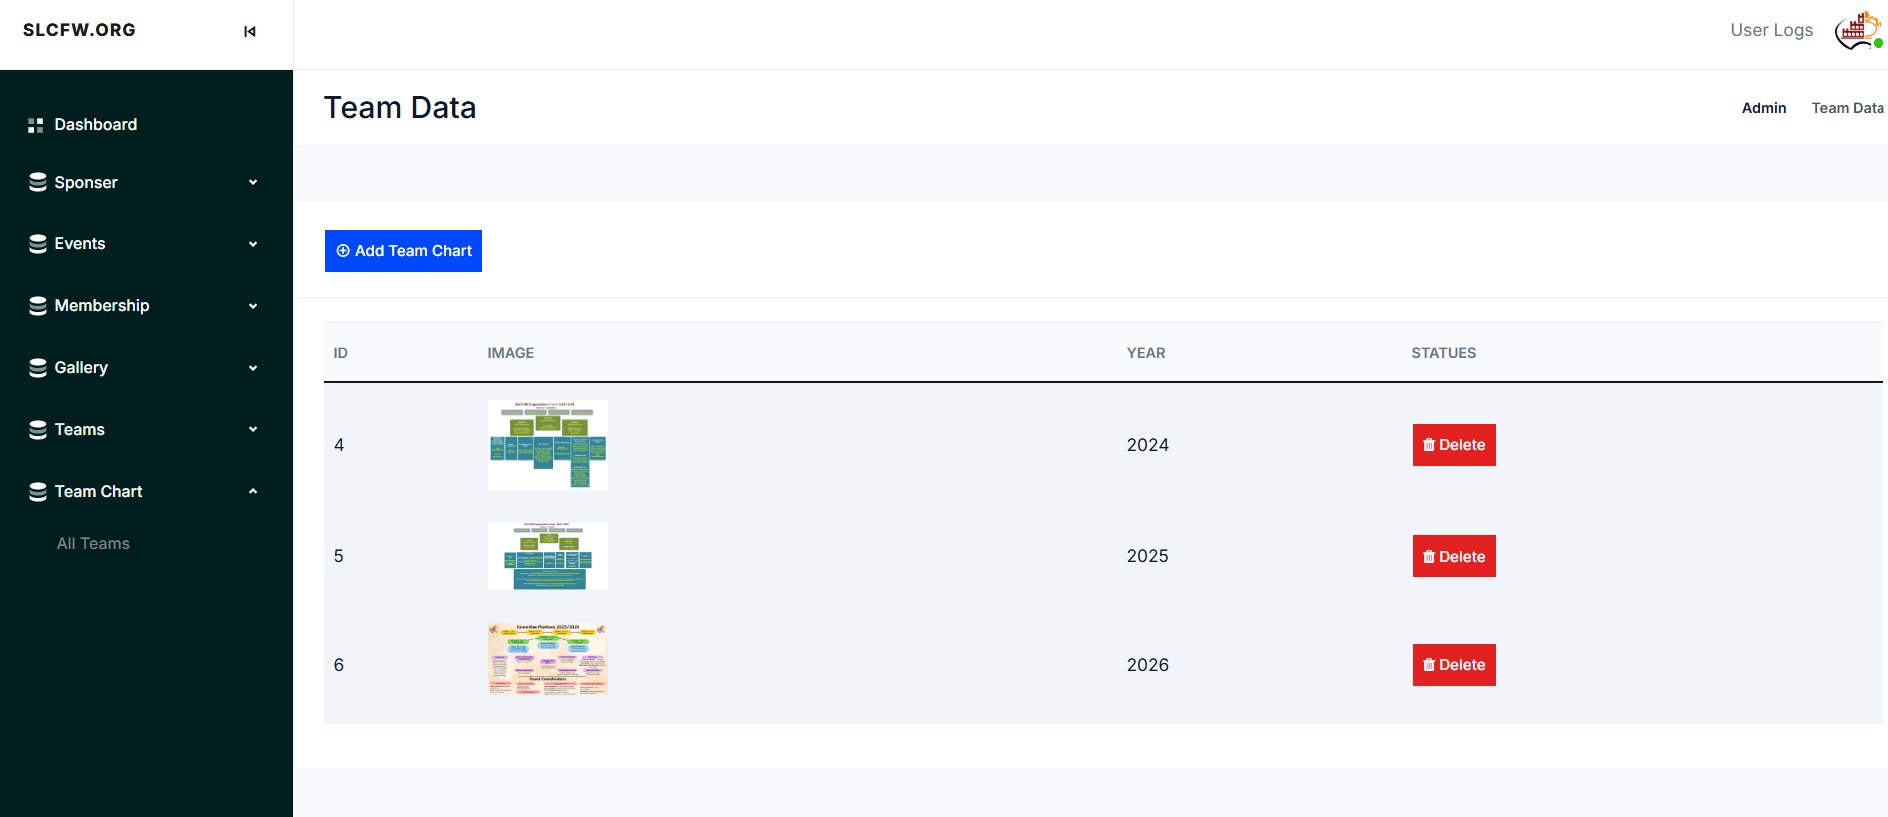
Open Team Chart to manage yearly team-chart images. Use Add Team Chart to upload a new chart and assign its year.